Data Source Configuration
This guide will walk you through the process of configuring your data sources using the Seal AI Data Source Assistant.
Using the Data Source Assistant
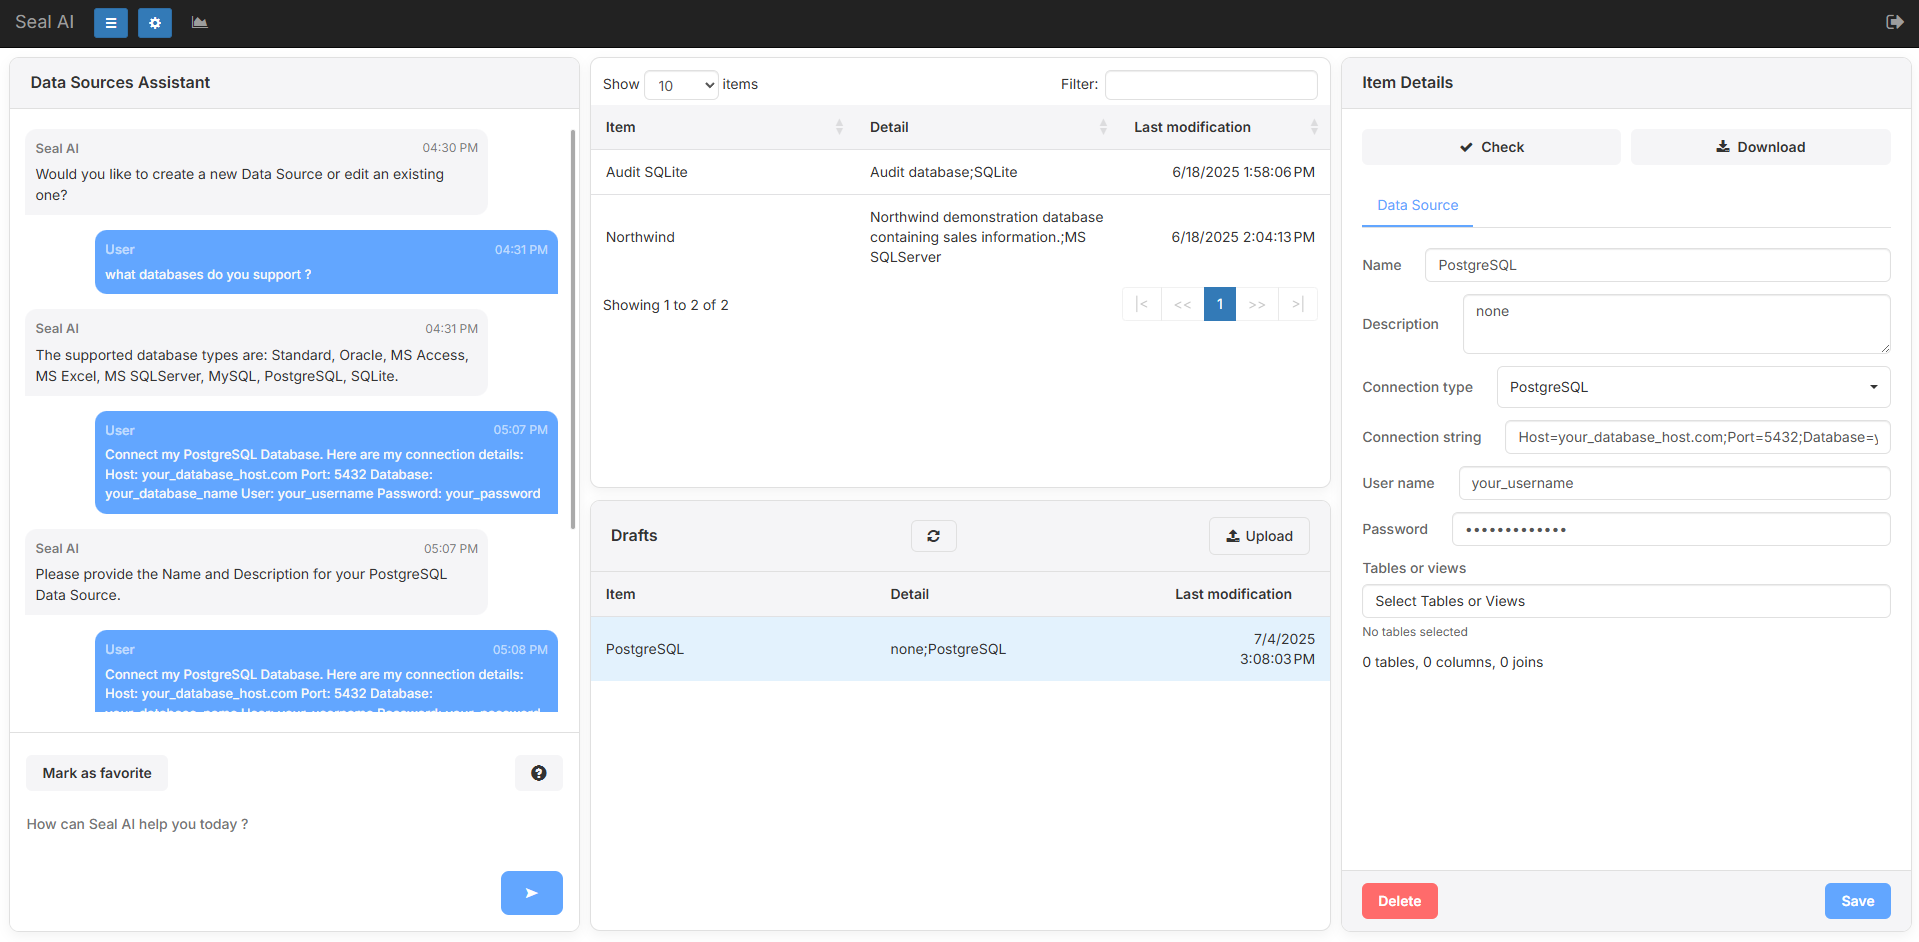
The Data Source Assistant is an interactive AI-powered chat interface designed to simplify the process of connecting your databases and other data sources to Seal AI.
-
Accessing the Data Source Assistant: Navigate to the "Data Sources" page from your Seal AI dashboard. You will be directed to the Data Source Assistant page.
-
Interacting with Seal AI: On the left side of your screen, you will see a chat interface. This is Seal AI, your intelligent assistant that will guide you through the configuration process and help you generate reports.
-
Your First Prompt: To begin, you can provide Seal AI with an initial prompt specifying the type of database you wish to connect and its connection details. Use the following format, replacing the bracketed text with your actual database type and details:
Connect my [Oracle | MS Access | MS Excel | MS SQLServer | PostgreSQL] Database.
Here are my connection details:
[Your connection detail 1]
[Your connection detail 2]
[Your connection detail 3]
...
Example:
Connect my PostgreSQL Database.

Here are my connection details:
Host: your_database_host.com
Port: 5432
Database: your_database_name
User: your_username
Password: your_password

Name: PostgreSQL
Description: none
Reviewing and Checking the Connection:
-
After you provide the prompt, Seal AI will process the information and create a new data source entry, which you will find under the "Drafts" section.
-
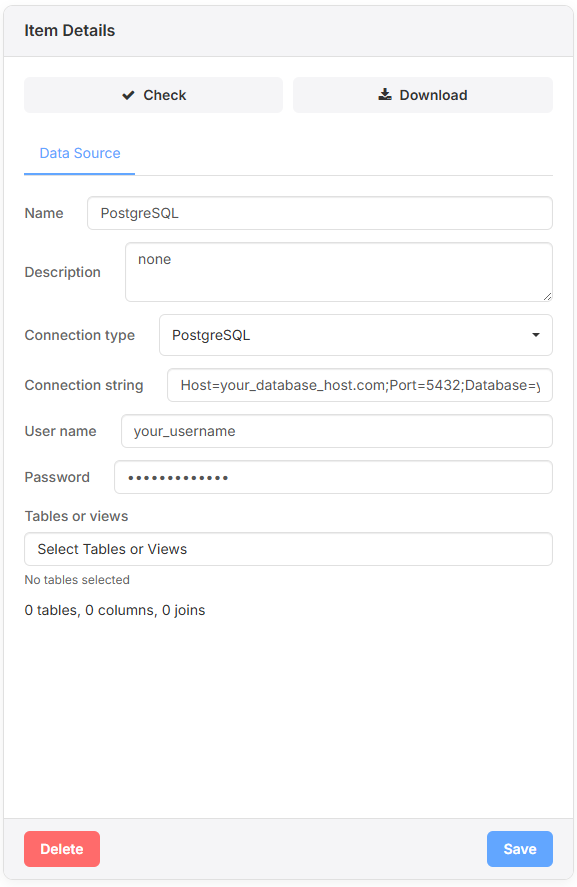
Click on the newly created draft entry to open its "Item Details" menu.
-
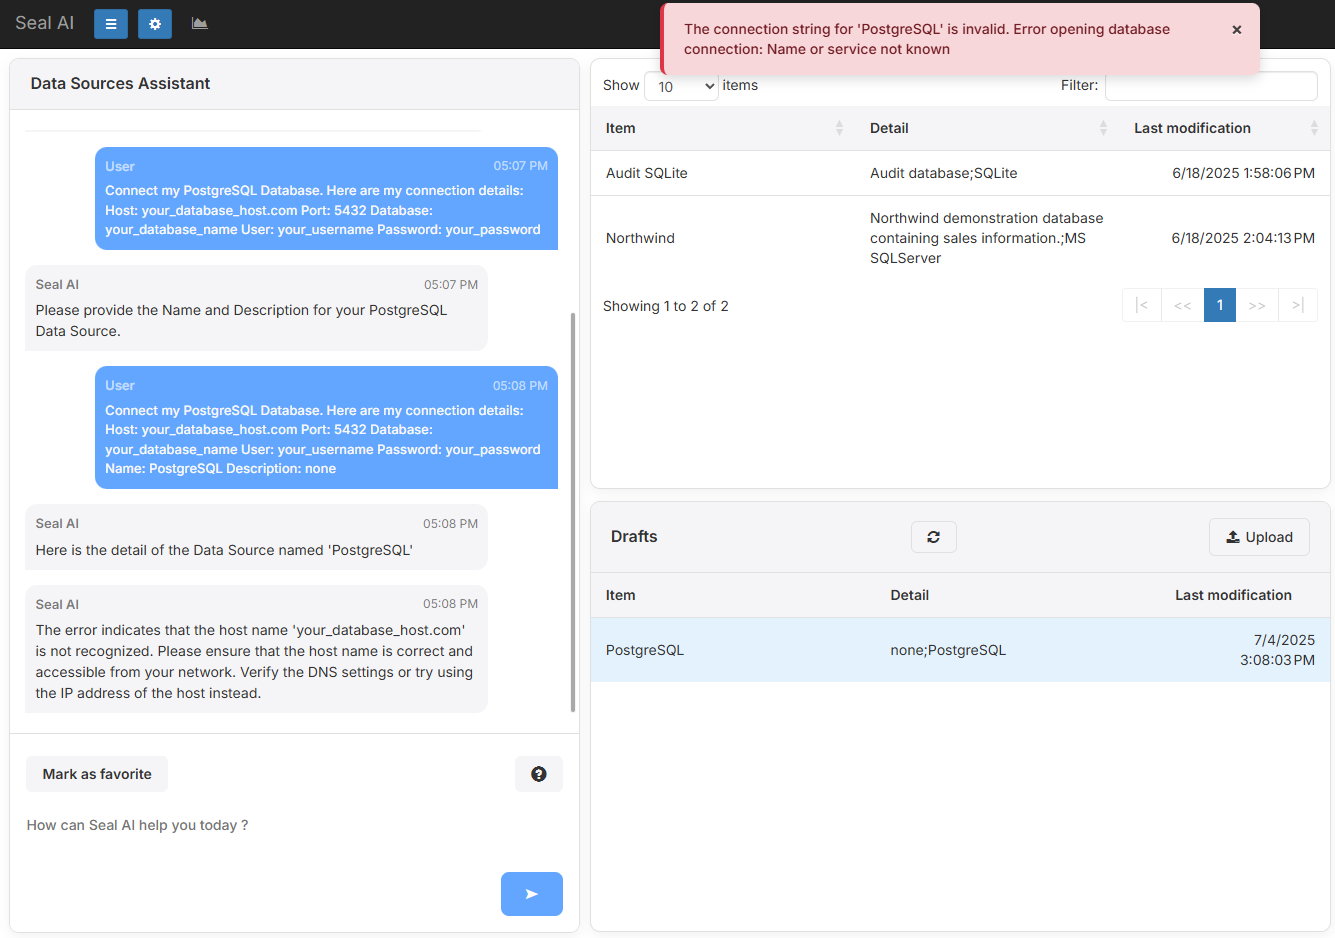
In the "Item Details" menu, click on the "Check" button. This action will initiate a connection test to your specified data source.
Troubleshooting (If Errors Occur):
- If there are any issues with the connection, Seal AI will attempt to identify the problem and either suggest a fix or ask for additional information to resolve the error. Follow the prompts provided by Seal AI.
Saving Your Datasource:
-
If the connection check is successful (i.e., no errors are reported), click the "Save" button located at the bottom-right of the "Item Details" menu.
-
Once saved, your data source will be permanently configured and available for future use within Seal AI.
Understanding the Details Panel
Once a data source has been generated/created and added to your Draft Items, you can click on it to reveal additional information in the Item Details panel on the right.
Data Source Tab
The Data Source tab displays core information including:
- Name: The identifier you provided for the source.
- Description: Optional details to help distinguish the source.
- Connection Type: The database type (e.g., PostgreSQL, MS SQLServer).
- Connection String: The actual string used to connect to your data.
- Username and Password: The credentials used for accessing your database.
These parameters reflect the information you initially gave to Seal AI. If all the details are correct and the connection check has passed, be sure to click Save.
After saving, your data source will appear in the upper middle section of your data sources list. By clicking it again, you can set up which Tables or Views are available for this data source. Selecting the relevant tables and views ensures only the data you need will be accessible for later report generations.
Tip:
Only select the tables and views you require. This keeps your workspace organized and helps prevent unnecessary context clutter and resource consumption.
Always remember to Save your selections in the detail section to finalize the configuration.